Friday, July 13, 2012

Create a Retro Chrome Automobile Emblem in Photoshop

0 comments

Step 1


The first thing we’re going to do is create our background. Create a new document, ours is 1920 x 1280, and unlock the background layer.
It doesn’t matter what color it is, because we are going to override that color using layer styles.
Double click the name of your background layer in the Layers palette to open the layer styles dialog box. Apply the following layer styles settings, using a medium red to dark red gradient for the Gradient Overlay.
You should end up with something similar to the image below.

Step 2


Using the pen tool, draw a black shape with a jagged line across the top as a new layer. This shape is going to be used to simulate the reflection of mountains in the distance.

Step 3


Change the Fill to 0% in the Layers palette, and apply the following layer style settings.
You should end up with an image similar to the one below.

Step 4


Create a new layer and fill it with white. With your new layer selected, Command/Ctrl + Click the vector mask icon for your mountain reflection shape in the Layers palette to make a selection of your shape.
Press Delete to delete that portion from your new white layer, leaving you with the image below.
Set the fill to 0% in the Layers palette and apply the following layer style settings to achieve the result below.

Step 5


Now that we have a nice reflective, red car paint effect, it’s time to create our emblem.
Draw an oval shape using the Ellipse tool, set the Fill to 0% in the Layers palette, and apply the following layer style settings to achieve the result below. The Inner Shadow effect will be used to simulate the shadow of our chrome border when we create it later.

Step 6


Duplicate your oval layer, clear the layer style settings, set the Fill to 0% in the Layers palette, and apply a black outer stroke of 25px.
Right click the layer in the Layer palette and click Convert to Smart Object. This will allow us to style the stroke as a shape, while giving us the ability to edit the thickness later on.

Step 7


Apply the following layer style settings to your newly created Smart Object to give it a chrome effect.

Step 8


Next we will create a mountain shape to reflect within our oval.
Create a new layer without anything in it. With your new layer still selected, Command/Ctrl + Click the thumbnail of your Oval shape in the Layers palette to make an oval selection. Next, Command/Ctrl + ALT + Click the white layer you created as a negative of your original mountain shape. This will subtract that shape from your selection.
Fill your selection with black and apply the following layer style settings to achieve the result below.

Step 9


Duplicate your oval shape, clear the layer styles, and move it above all the rest.
Set the Fill to 0% in the Layers palette and apply the following layer style settings for some subtle lighting effects.

Step 10


Duplicate your top oval shape and clear the layer styles.
Set the Fill to 0% in the Layers palette and apply the following layer style settings for one last shadow effect.

Step 11


Now for the star of our show.
In order for this retro effect to work, you need a retro style typeface.
We are using the beautifully designed "Cocktail Shaker", which you can get at Font Bros.
Create your text and apply the following layer style settings for a chrome look.

Step 12


Next we will create our checkerboard pattern.
Create a new document that is 200 square pixels with a white background. Draw two, 100 pixel black boxes and place them in the upper left corner, and lower right corner.
Press Command/Ctrl + A to select your entire canvas and click Edit > Define Pattern. Name your checkerboard pattern and click OK.

Step 13


Switch back over to your main document.
Draw two, 100 pixel tall strips across the top and bottom of your canvas.
Apply the following layer style settings, using our checkboard pattern for the Pattern Overlay.


Reference : psdtuts+


Final Image


That’s it! Using some simple selection tools and Photoshop layer styles, you now have your very own retro chrome emblem.

Tuesday, July 10, 2012

12 Essential Rules to Follow When Designing a Logo

0 comments
The logo is the face of any brand — the very first impression — so its design is extremely important.
When executed correctly, a logo is a powerful asset to your client’s brand.
However, creating an effective visual representation of a brand requires much more than just graphic design.
Like any line of work that involves a set of specific skills, logo design requires plenty of practice and experience for it to be successful; knowledge is definitely power for any graphic designer.
For this reason, we have outlined 12 essential rules to follow in order to design an effective logo.

1. Preliminary Work Is a Must

Post Image
Preliminary sketches are an important first step in designing an effective logo.
These can be as simple as paper and pen drawings or drafts made using a vector program, such as Illustrator.
The bottom line is that you compromise the final result if you rush, or skip, this step.
Start with 20 to 30 sketches or ideas and then branch out to create variations of the original ideas.
If nothing seems to work, start over and begin sketching new ideas.
An effective graphic designer will spend more time on this preliminary work than any other step in the design process.

2. Create Balance


Balance is important in logo design because our minds naturally perceive a balanced design as being pleasing and appealing.
Keep your logo balanced by keeping the “weight” of the graphics, colors, and size equal on each side.
Though the rule of balance can occasionally be broken, remember that your logo will be viewed by the masses, not just those with an eye for great art, so a balanced design is the safest approach.

3. Size Matters


When it comes to logo design, size does matter. A logo has to look good and be legible at all sizes.
A logo is not effective if it loses too much definition when scaled down for letterheads, envelopes, and small promotional items. The logo also has to look good when used for larger formats, such as posters, billboards, and electronic formats such as TV and the Web.
The most reliable way to determine if a logo works at all sizes is to actually test it yourself.
Note that the smallest scale is usually the hardest to get right, so start by printing the logo on a letterhead or envelope and see if it is still legible.
You can also test for large-scale rendering by printing a poster-sized version at a print shop.

4. Clever Use of Color

Post Image

Color theory is complex, but designers who understand the basics are able to use color to their advantage.
The basic rules to keep in mind are:
  • Use colors near to each other on the color wheel (e.g. for a “warm” palette, use red, orange, and yellow hues).
  • Don’t use colors that are so bright that they are hard on the eyes.
  • The logo must also look good in black and white, grayscale, and two colors.
  • Breaking the rules sometimes is okay; just make sure you have a good reason to!
Knowing how colors evoke feelings and moods is also important. For example, red can evoke feelings of aggression, love, passion, and strength.
Keep this in mind as you try out different color combinations, and try to match the color to the overall tone and feel of the brand.
Playing around with individual colors on their own is another good idea. Some brands are recognizable solely by their distinct color.
For example, when you think of John Deere, you think of the “John Deere green” color, and this sets this brand apart from its competitors and, more importantly, makes the brand all the more recognizable.

5. Design Style Should Suit the Company


Post Image

You can use various design styles when creating a logo, and to pick the right one, you should have some background information about the client and the brand.
A recent trend in logo design is the Web 2.0 style of 3D-looking logos, with “bubbly” graphics, gradients, and drop shadows.
This style may work well for a Web 2.0 website or tech company, but may not be effective for other kinds of brands.
Research your client and its audience before you begin your preliminary work.
This will help you determine the best design style from the start and save you from having to return repeatedly to the drawing board.

6. Typography Matters… a Lot!


Choosing the right font type and size is much more difficult than many beginner designers realize.
If your logo design includes text, either as part of the logo or in the tagline, you will need to spend time sorting through various font types — often, dozens of them — and testing them in your design before making a final decision.
Try both serif fonts and sans-serif fonts as well as script, italics, bold, and custom fonts.
Consider three main points when choosing a font to accompany your logo design:
  • Avoid the most commonly used fonts, such as Comic Sans, or else your design may come off as amateurish.
  • Make sure the font is legible when scaled down, especially with script fonts.
  • One font is ideal, and avoid more than two.
Strongly consider a custom font for your design. The more original the font, the more it will distinguish the brand. Examples of successful logos that have a custom font are Yahoo!, Twitter, and Coca Cola.

7. The Goal IS Recognition

Post Image
The whole point of creating a logo is to build brand recognition. So, how do you go about doing this?
Well, it varies from case to case, but the goal with the logo is for the average person to instantly call the brand to mind.
A few examples of this are the logos for Coca-Cola, Pepsi, McDonald’s, and Nike.
Just a glimpse of any of these logos is all you need to recognize the brands.
The key to making a popular and recognizable logo is to combine all of the elements discussed in this article: size, style, color, typography, and originality.
Overlooking any of these during the design process will impair the quality of your final design. Examine your own logo design and see whether it meets all of these criteria.
A quick test to determine if your logo is recognizable enough is to invert it using any graphic design software and see if you can still recognize the brand. Additionally, you should mirror the logo and see if it’s easily recognizable in this state.
Keep in mind that logos aren’t always seen head-on in real world situations, for example, on the side of a bus or a billboard that you drive by.
Therefore, you should make sure to view your logo design from all angles and ensure that it’s recognizable from any direction before submitting it to your client.

8. Dare to be Different


To stand out from the competition, you must distinguish yourself as a designer with a distinct style. Rather than copy another design or style, be innovative and stand out from the crowd.
So, how can you be different? Try breaking the rules of design and taking risks.
Try a variety of styles to find the one that works best for your client. Try different color combinations until you find one that makes your design truly original.
Have fun with the design program you use, and keep tweaking the design until you feel you’ve got it right.

9. K.I.S.S. (Keep it Simple, Stupid)

Post Image

The simpler the logo, the more recognizable it will be.
For example, the Nike swoosh is an extremely simple logo and is also one of the most recognizable in the world.
Follow the K.I.S.S. rule right from the start of the design process, when you are brainstorming ideas and doodling sketches.
Often, you’ll find that you start with a relatively complicated design and end up with a simpler version of it in the end.
Work the design down to its essentials and leave out all unnecessary elements.

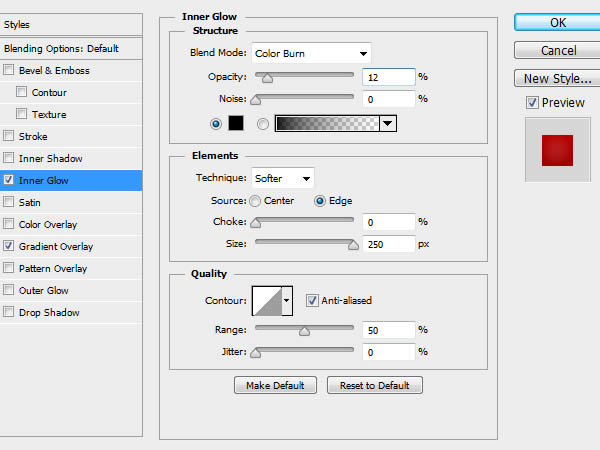
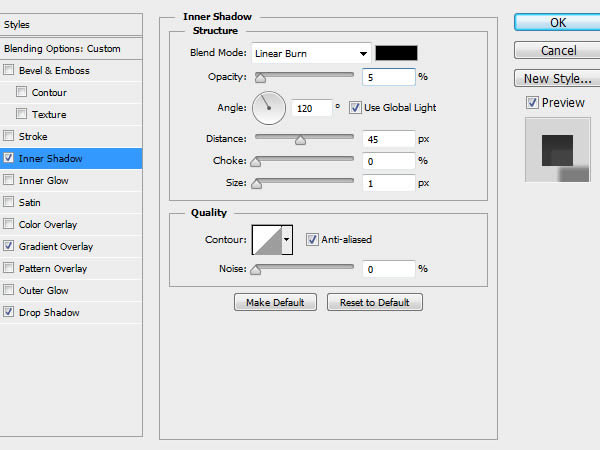
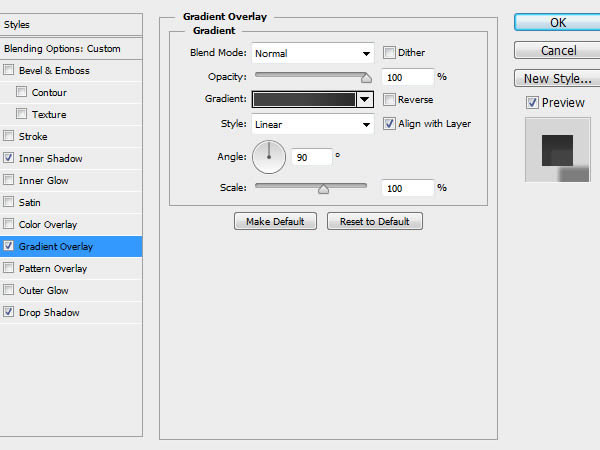
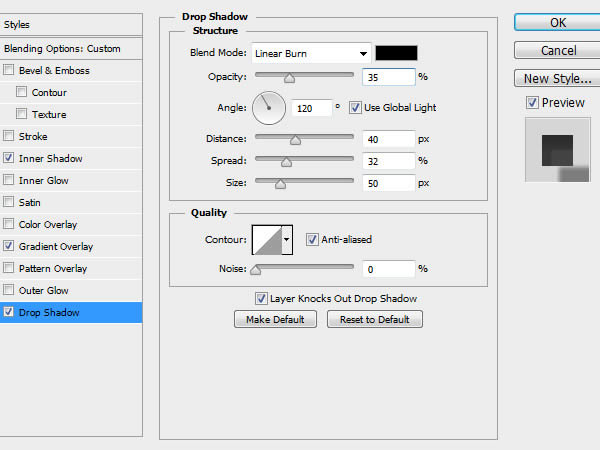
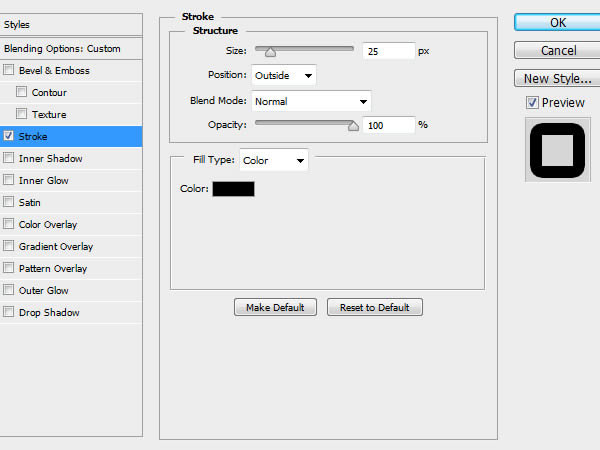
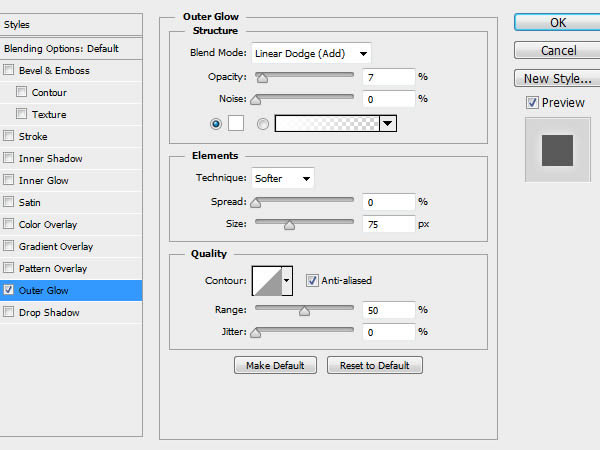
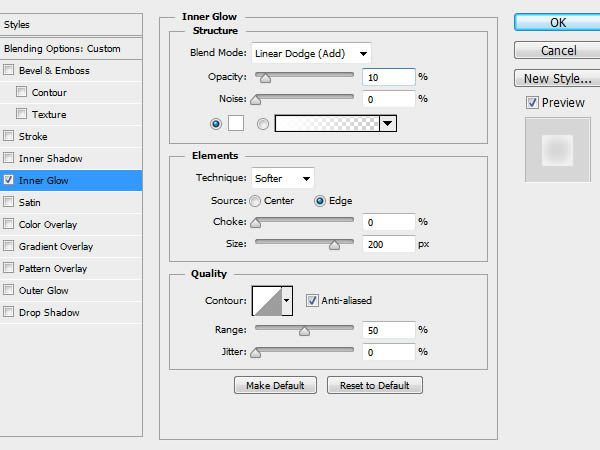
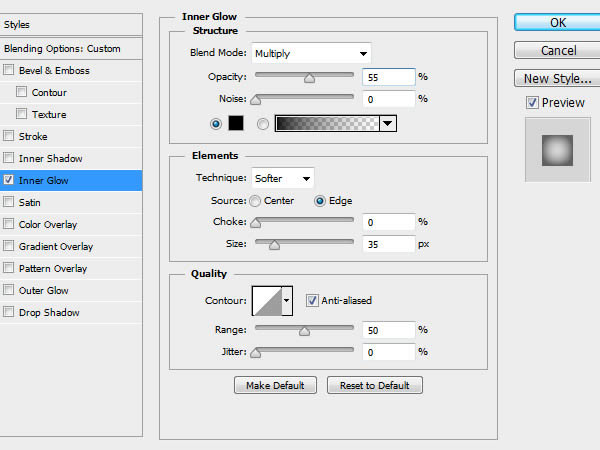
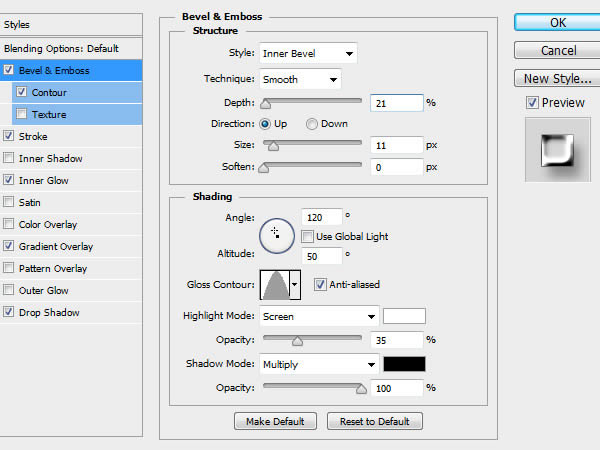
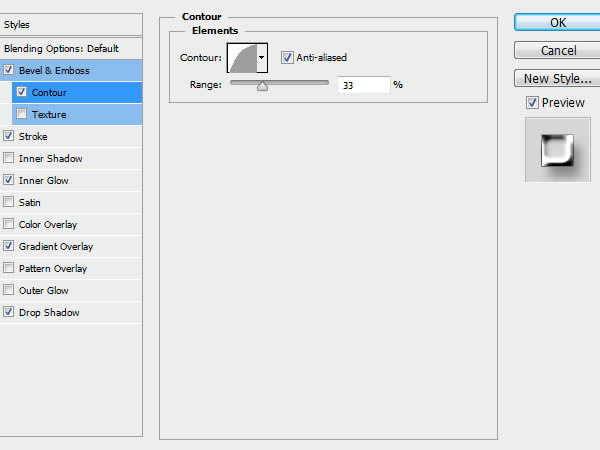
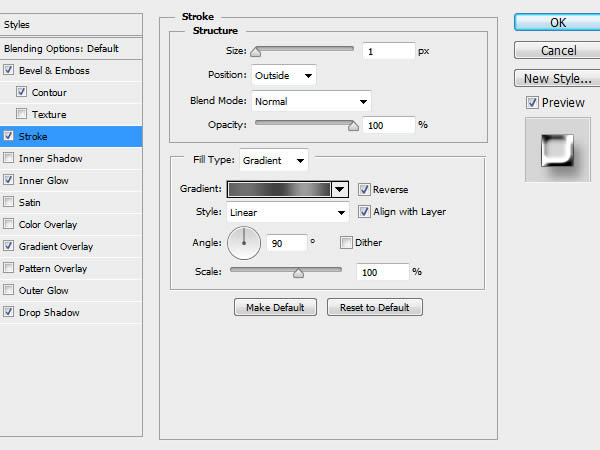
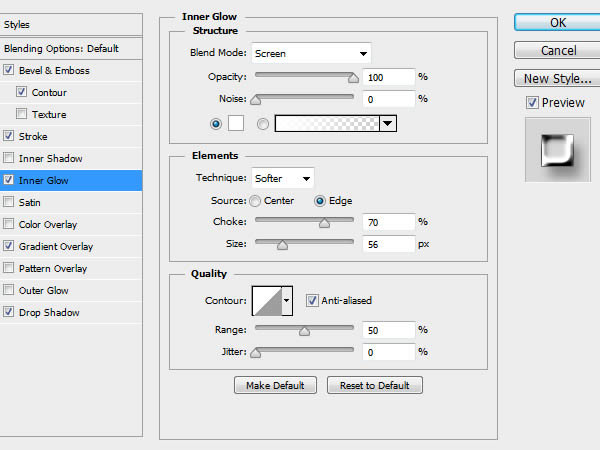
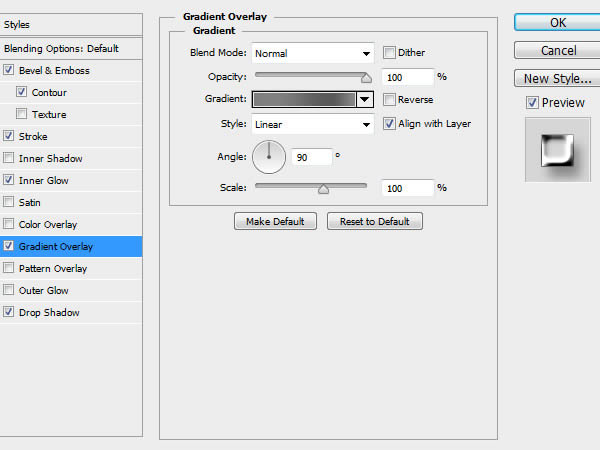
10. Go Easy on Effects


Adobe Illustrator, Freehand, Photoshop, and other graphic design programs are extremely powerful tools and have many filters and effects that you can apply to your logo, but don’t get carried away!
There’s a time and place for these powerful tools, but it is not necessarily to design a logo.
Of course, playing around and seeing whether they enhance a logo is fine, but just remember that simplicity is key.

11. Develop a Design “Assembly Line”


To produce consistently high-quality logos, you need to develop your own design process, or “assembly line.” This should include the following steps:
  • Research
  • Brainstorm and generate ideas
  • Preliminary sketches
  • Develop vector designs
  • Send to client
  • Add or remove anything the client wants
  • Finalize the design and resubmit to client
Although you may want to tweak the order slightly, you should follow these basic steps with each logo design.
This will help you streamline your work, stay organized, maintain focus, and deliver better quality and more consistent results with each job.

12. Use Other Designs for Inspiration Only!


The last rule for designing an effective logo is quite simple: don’t copy other designers’ work! While there’s nothing wrong with being inspired by other designers, copying another person’s ideas or work is morally and legally wrong.
Gallery websites exist that let you use vector art images free of charge, with proper attribution under the Creative Commons License, but I strongly recommend not going this route.
These websites can be helpful for getting ideas during the brainstorming stage, but you’re better off starting your design from scratch and making it 100% original.

Referance : webdesignerdepot

Thursday, July 5, 2012

Create a line-based vector tutorial portrait

0 comments

Create a line-based vector portrait

  • Software Illustrator CS3 or later
  • Time needed 5-6 hours
  • Skills
    • Add movement through linework and gradients
    • Create new brushes
    • Export vector into raster
In this tutorial we will create a series of vector shapes through line-manipulation, building up a portrait in the style of Joy Division's cult album, Unknown Pleasures.
I'll show you how to create shapes from flowing linework, and how to use curving gradients to create atmosphere and a sense of movement in your work. You don't have to stick with two or three-coloured gradients, as used here - feel free to experiment with more complex arrangements. You could also add some radial fills for an even more striking image.


Base photograph 8mp

01 Use a photograph as your base. This is an original photo of a girl, taken with an ordinary 8-megapixel camera. Take as many pictures as possible, from different angles, and play with different poses.


photo layer top drawing layer

02 In Illustrator, using the Layers panel create a new layer and fix your chosen photo onto it. Create another layer above it - this is what we will be drawing on. Draw a horizontal line across your whole image with the Line Segment tool.


Base lines

03 Now we will create a base consisting of a row of straight lines. Select your line, press Alt/Opt+Shift, and copy it, moving the copy a little above the original line. With both selected, press Ctrl/Cmd+D and duplicate them until you've filled the image.


Lines anchor points pen

04 Starting near the bottom, create points along each line - along the borders of each main shape - using the Pen Tool (Ctrl/Cmd+P). To smooth them, select the points and select 'Convert selected anchor points to smooth' on the top panel. The border between the shape and the background will be fixed with the anchor points, which we are not going to touch. The background will be smooth.


edit direct selection

05 Now we begin to edit the shape of each line. Move the points upwards using the Direct Selection tool, making sure you represent key features in your model that break the horizontal flow of the line. You'll almost need to use sculpting skills for this.


base line key features

06 When the base line for a key feature is finished, move up to the next line and edit it in the same orientation, following the shape. In those places where you need a clearly defined shape, the points must be located as closely to each other as possible.


thick stroke

07 Edit the thickness of the lines using the Stroke options. Use a range of sizes - each individual line should have a different weight. By using a range of thick and thin lines, you'll be able to add extra dynamics to the image. Of course, it'll take some time, but stick with it and the result will be impressive.


copy new layer

08 When your line image is ready, copy it and hide the copy in a new layer - you will need a duplicate later. Now it's time for experimentation. Select your image and go to Object>Expand. This will turn your lines into Contiguous objects. Now go to Pathfinder>Add To Shape Area>Expand.


select boarder

09 Next we select the borders of our image. Draw a rectangle with a solid colour above it. Select all, and go to Pathfinder>Exclude Overlapping Shape Areas> Expand. Next, click Release Compound Path.


colour fill gradient

10 Now we have a sort of a cast. Remove all unnecessary elements so that only your shapes are left, ready for a colour fill. You might choose only one gradient, or a variety of colours - but use specific shades for specific objects.


background gradient

11 First create a background. An appropriately chosen gradient will help to create the illusion of material. You can create your own gradient, or go to Window>Swatch Libraries>Gradients and choose one of the existing gradients.


hide edges angles

12 Select your image and go to View>Hide Edges (Ctrl/Cmd+H) for the easier Fill set-up. Now we can edit the gradient with no visual obstacles: move the slider bars on the Gradient slider, choose different Angle options, and experiment with the colours.


gif distrort lossy

13 When contrasts face each other head-on, it can lead to striking results. To create interesting effects, let's export the image as a GIF. Choose No Dither for the dither algorithm, set Lossy at a number greater than zero, and experiment with the other parameters. The result will be an interesting destructive effect - almost as though our image has been caught up in a pixel storm.


duplicate vector scatter

14 Let's now explore the options for how you can use your line image. Open your prepared duplicate. Create a vector object and use it to create a new scatter brush. A window will appear where you can choose the brush size and its other parameters. We will use this brush to treat our lines.


brushes, thick colour

15 Copy the image and then experiment with different brushes, changing the size values and colours as you prefer.