


Step 1: Download the GuideGuide Plugin
In today’s tutorial, I’m going to be using a free extension from Cameron McEfee called — appropriately — GuideGuide. Head over to http://www.guideguide.me to download the plugin.
Select the version that matches your Photoshop (CS4+) and save it to an appropriate location on your hard drive.
Step 2: Install the Extension
Making sure that your Photoshop is closed, open your Adobe Extension Manager.

Step 3: Enable the GuideGuide Window
Fire up Photoshop, and from the ‘Window’ file menu select ‘Extensions → GuideGuide’.
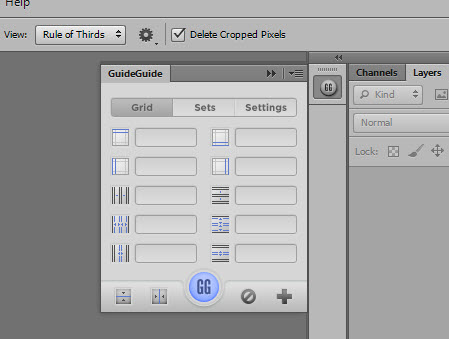
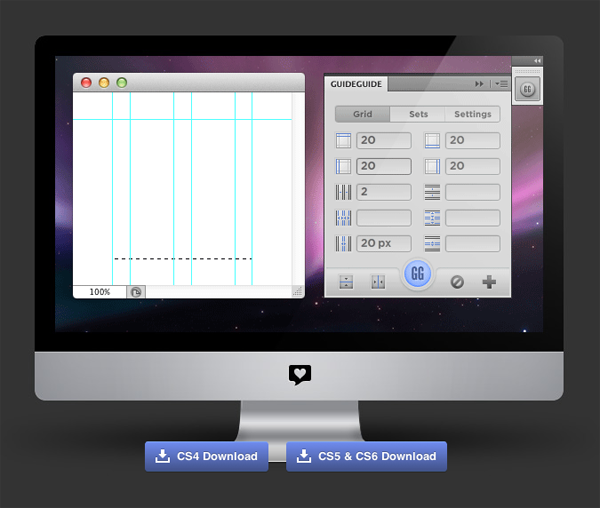
The GuideGuide extension will now appear in your workspace. Don’t worry too much about the input field yet, we’ll be digging into the extension shortly.
Step 4: Establish a Reference
We’re going to be keeping things really simple today and will be replicating the 960px grid used by 960 Grid System (though you’re welcome to approach grids using whichever measurements you find easiest). If we head over to the site, the grid that we’ll be replicating is layed out in plain english on the home page:
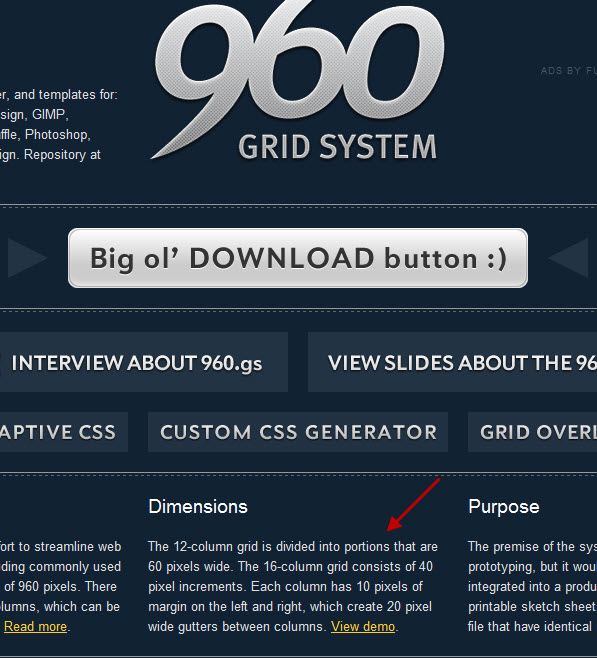
To rephrase this, what we’ll be creating today is a 960px wide canvas with 12 equally spaced and equally sized columns. With a 10px margin on either side of the canvas, we will be left with a 20px gutter between each of the columns.
Before we go on, I know what you may be saying: "Why not just download the Photoshop template from the site?". What I’ll be showing you how to create today is completely customizable for any project and any CSS framework, regardless of the amount of columns, canvas width or gutters. We’re just using a simple example to demonstrate the techniques.
Step 5: Create a New Document
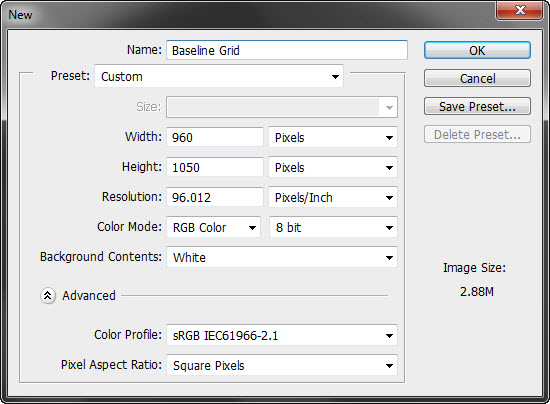
In Photoshop, select File → New and create a new document 960px wide by 1050px high.
Step 6: Create Some Guides
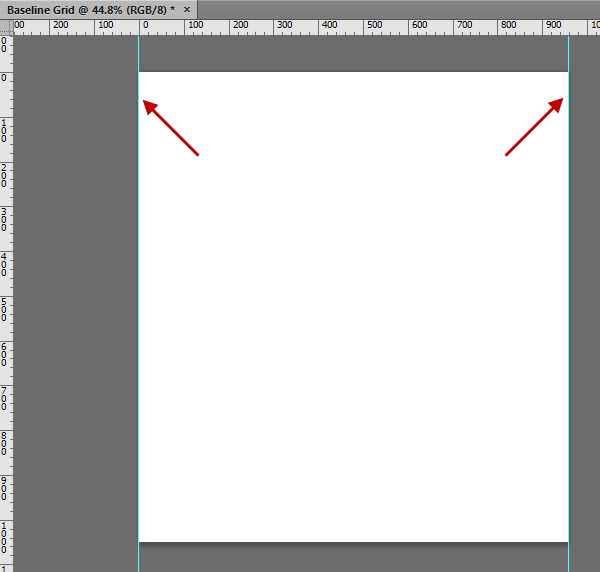
Making sure that your rulers are displayed (View → Rulers) drag out two guides to the edges of the canvas.
Step 7: Put GuideGuide to Work
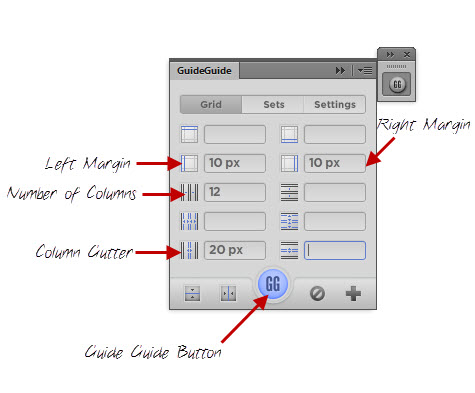
Opening up the GuideGuide extension, you’ll notice a number of input fields and menu items that will allow us to define our horizontal baseline grid, as follows (you can also hover over each icon for a description.)
Input the values as follows and click the GuideGuide button:

Note: Using GuideGuide without a selection will automatically render guides across the entire canvas. If you only wanted guides over a portion of the document (for example, a navigation bar), create a selection with the Marquee tool (M) before using the extension.
Step 8: Add a Visual Helper
As it stands, we have a perfectly usable horizontal baseline grid. To make things easier for ourselves, we’re now going to add a visual helper to tell us what a column is and what a gutter is — something that can be tricky to differentiate when zoomed right in on the document.
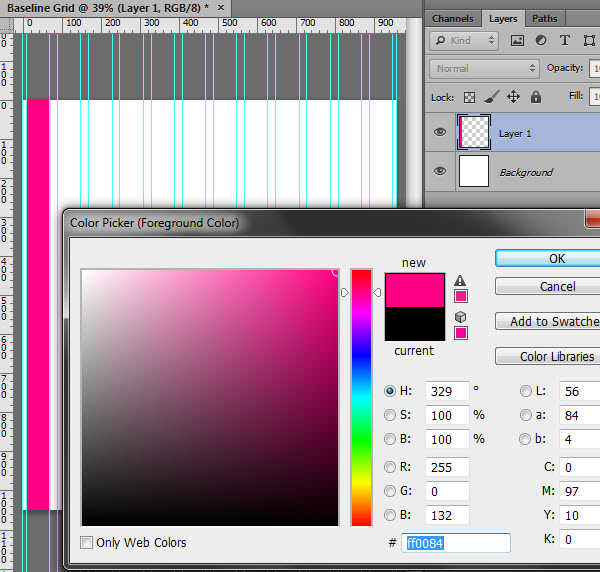
Create a new layer (Ctrl + Shift + N) and draw out a selection the width and height of the first column. Pressing Ctrl + BkSpace, fill the selection with #ff0084. You’re also welcome to use the shape tool for this, but be sure your pixels are precisely selected.
Next, create 12 total versions of the layer by pressing Ctrl + J 11 times. Selecting the uppermost layer, drag the column to the twelfth column position with the Move tool (V).
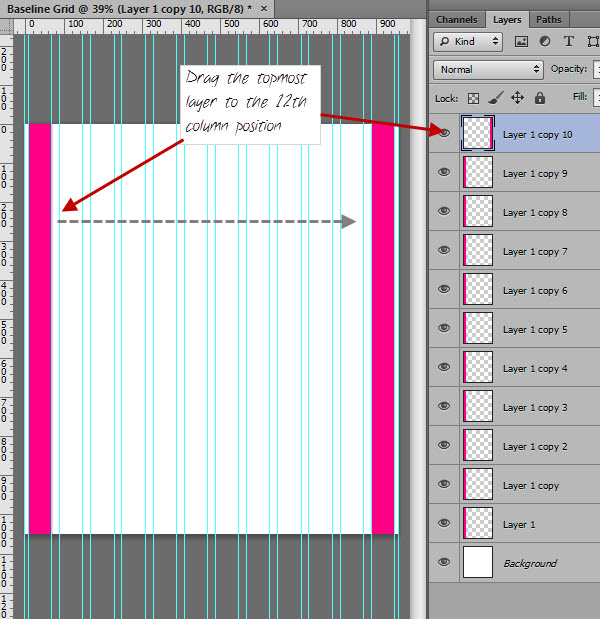
Next, select all twelve layers (Ctrl + Click) and distribute the columns by selecting the Distribute Horizontal Centers icon under the Move tool (V) (alternatively, Layer → Align → Horizontal Centers)


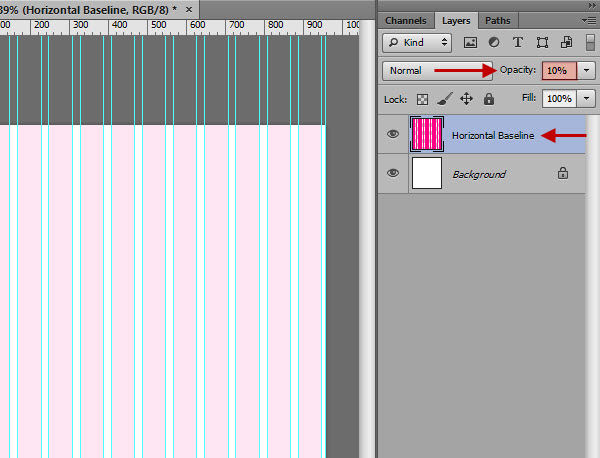
Finally, clean up the document by selecting all of the column layers and merging them together (Ctrl + E). Rename the layer ‘Horizontal Baseline’ and dial the opacity down to 10%.
Step 9: Vertical Baseline (Method One)
Now that we’ve established a horizontal baseline, it’s time to move onto our vertical baseline. We’re not going to delve into the theory of vertical baselines today, but if you’d like to learn more you can read about Setting Web Type to a Baseline Grid.
Today, we’ll be setting our vertical baseline based on a body font size of 14px. To establish a 1.5 line height, and to give us plenty of flexibility, our base line will be 7px (i.e. three baseline units equal 21px).
I’m going to be showing you two methods to achieve this — feel free to use whichever one speaks to you and your workflow!
To start off, we’re going to be using GuideGuide once more. Open up the extension, enter the following value and press the GuideGuide button:
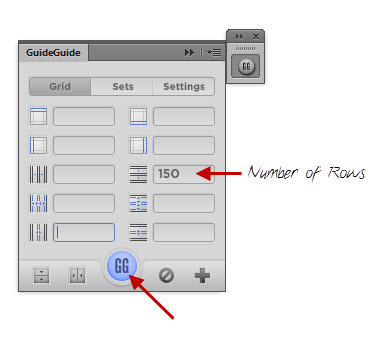
At this point, the more astute reader will have realized that this method is only made possible because we created our document height in a perfect multiple of 7px (1050px). If we didn’t take this initial step, the GuideGuide would render as many 7px guides as possible and leave the remainder at the bottom of the document.
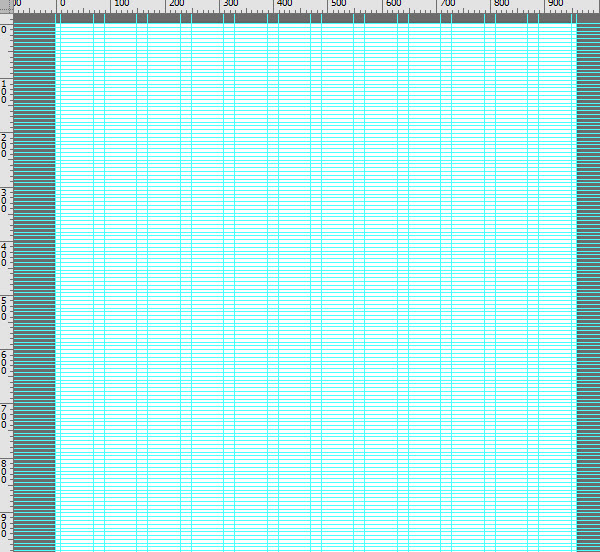
And in that simple step, we’ve created a perfectly functional vertical baseline. The only problem is that this document is now very busy. Also, if you’re in the habit of using guides in your designs, this method can quickly become confusing, messy and unusable.
If this method doesn’t tickle your fancy, you can remove the horizontal guides (Ctrl + Alt + Z) and create an alternative baseline using a pixel grid.
Step 10: Vertical Baseline (Method Two)
For our alternative method, open up Photoshop’s grid preference panel (Edit → Preferences → Grids, Guides and Slices). Enter in the following values for the pixel grid:
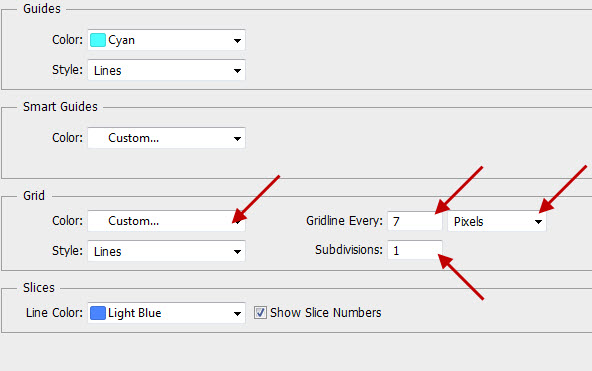
Now, returning to your document, you can toggle the visibility of the grid on and off (Ctrl + ‘), where each horizontal line of the grid establishes your vertical baseline — as you can see here with a 600% zoom applied
.
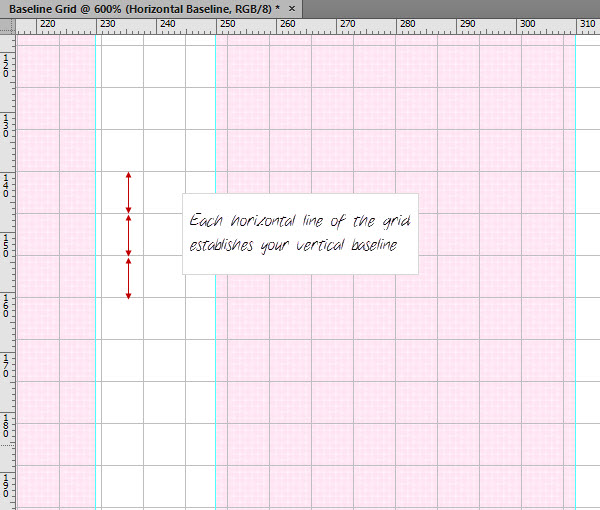
The great thing about this method is that we’ve separated the horizontal and vertical baselines, allowing you to easily toggle their visibility depending on which part of the design you’re working on.
Step 11: Create a Visual Helper
Whatever method you prefer (guides or grid layers), the final step is to create a visual helper for our vertical baseline in the same way that we did for our horizontal baseline (but we’re going to use a different method).
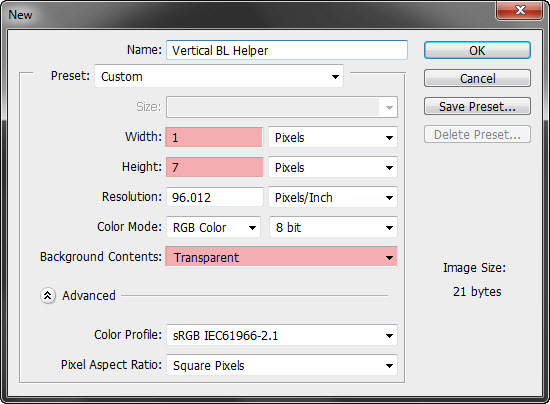
Create a new document 1px x 7px with a transparent background:
Using the Marquee tool (M), set the Style to Fixed Size, and the dimensions to 1px x 1px. Create a selection at the bottom of the document (you’ll want to be zoomed in as far as you can go here (Z)) and fill it with #00ff12 (Ctrl + Bkspace).
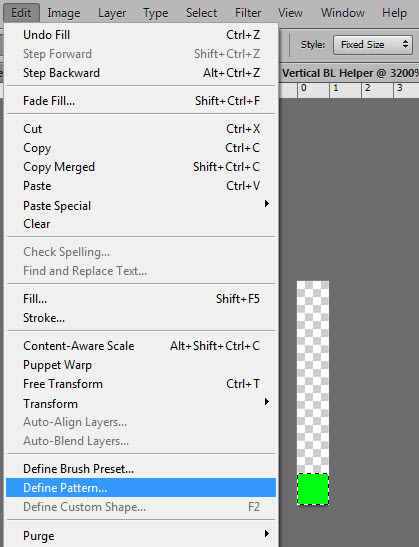
Next, define this document as a pattern (Edit → Define Pattern). Name it ’7px Vertical Baseline’.
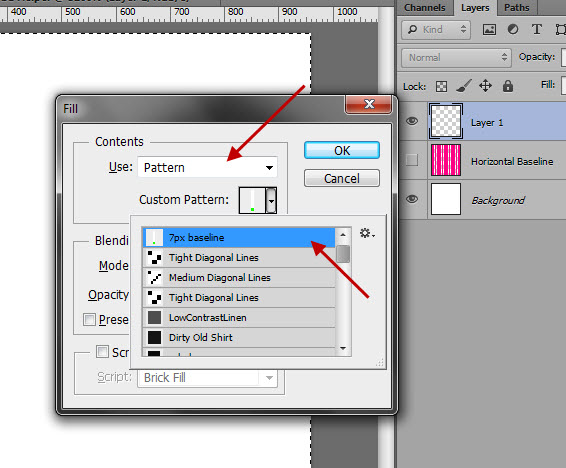
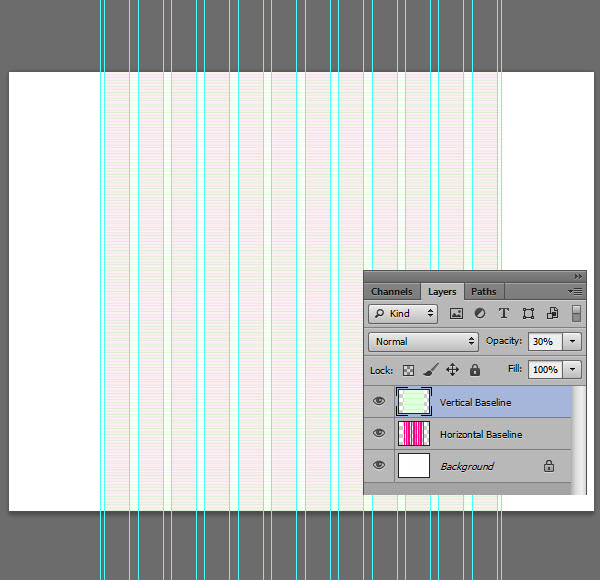
Head back to your main document. Create a new layer (Ctrl + Shift + N), select the entire canvas (Ctrl + A) and press Ctrl + Bkspace to fill the selection. From the dropdown menus, select ‘Pattern’ for the fill type and your newly created ’7px baseline’ for the pattern.
Rename the layer to ‘Vertical Baseline’ and dial the opacity down to around 30%.

Although elements won’t snap to either of the visual helpers, whatever method you used for the vertical baseline (guides or grid layers) in the previous steps, your newly created visual layer will be perfectly aligned to the baseline — allowing easy snapping for the entire design.
Step 12: Breathing Room
And with that, you’ve created a pixel perfect baseline grid with handy visual layers for your next project. The only thing left to do is to give your design a bit of breathing room.
Open up your Canvas Size dialog (Image → Canvas Size) and change the width to 1400px.

The final result:
Conclusion
If you’ve made it all the way through, good work! You now have all the techniques required to create your own custom baseline grids in Photoshop.
The only advice that I’d offer is that although GuideGuide does a great job of handling all of the necessary math, it has to work within Photoshop’s limitiations, namely that guides can only be placed on a full pixel. If your grid calls for sub-pixel measurements, guides will be rendered as closely as possible, with their positions being rounded up to the nearest full pixel. With that in mind, a little planning at the start can avoid a lot of one-pixel headaches later on in the project.
As a parting note, you can use GuideGuide for much more than just baselines; experiment using it for laying out grids for all sorts of design components from picture frames to menus!
Thanks again, and don’t forget to subscribe and leave a comment below — we’d love to hear your thoughts!
REFERENCE: Webdesign


0 comments:
Post a Comment
Note: Only a member of this blog may post a comment.